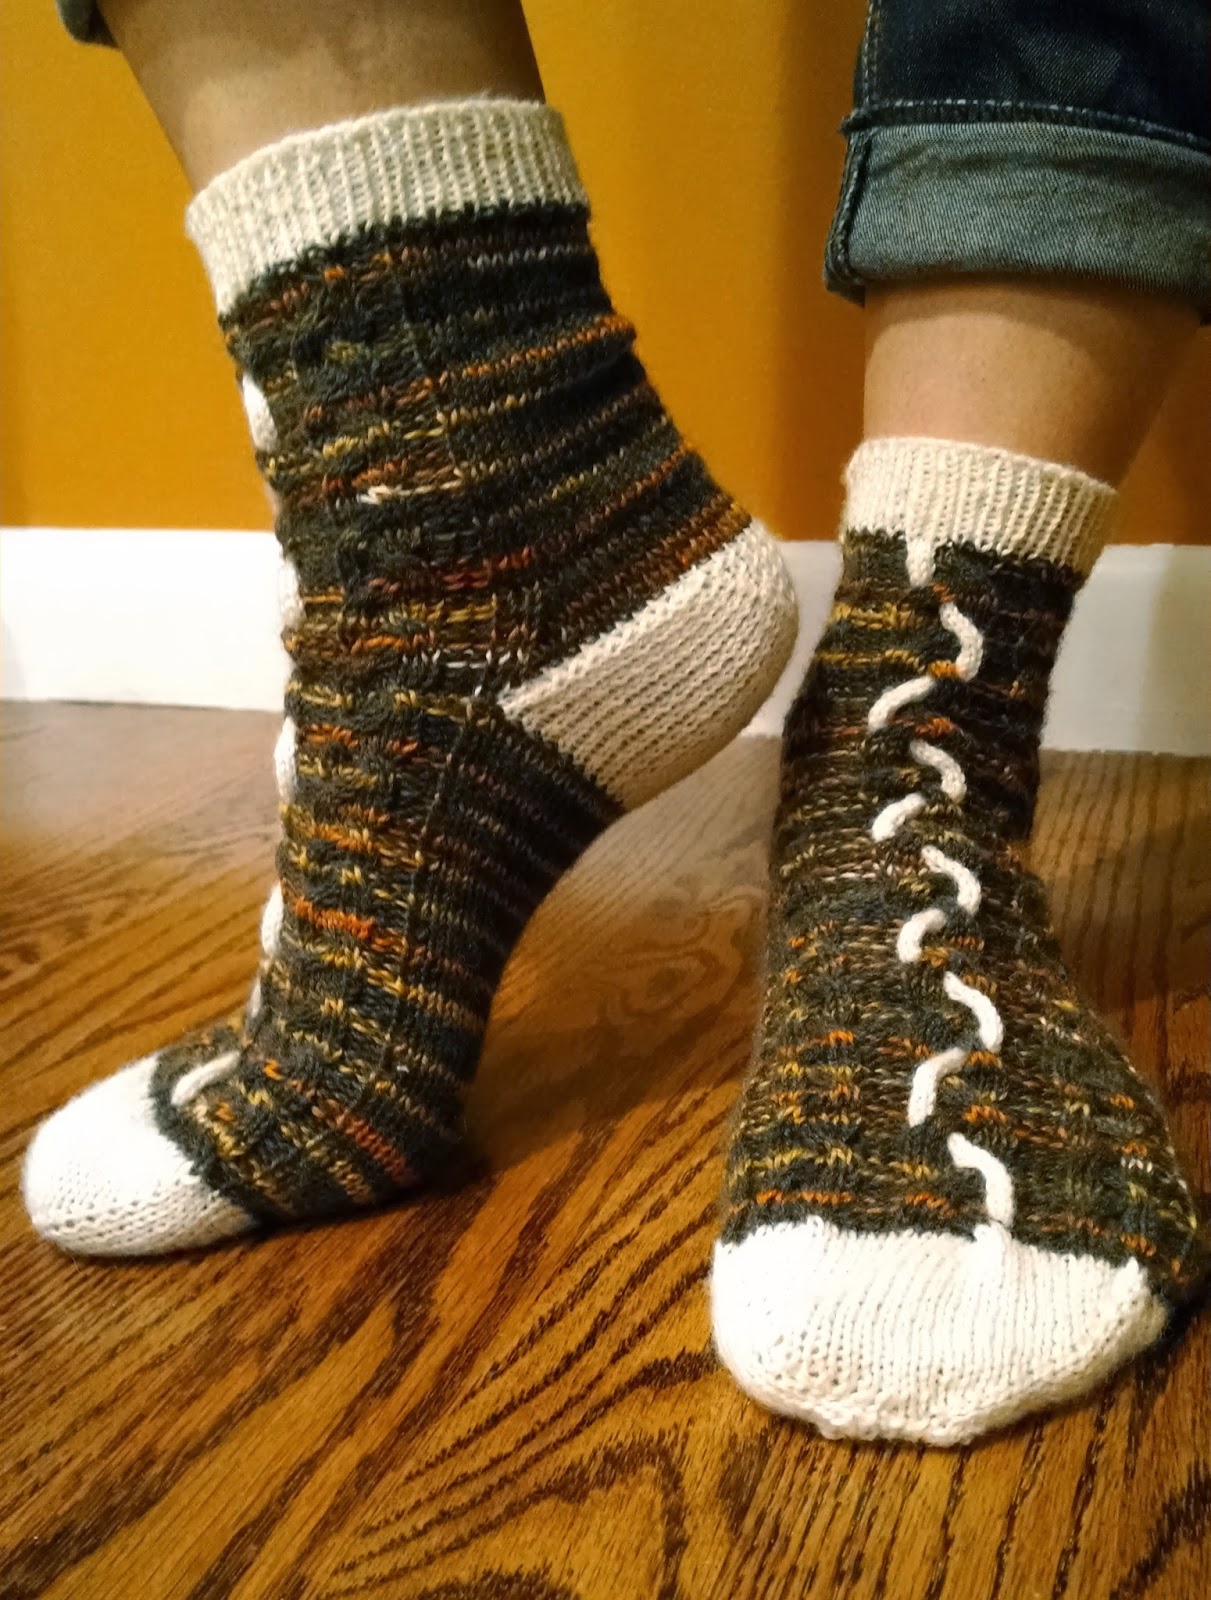

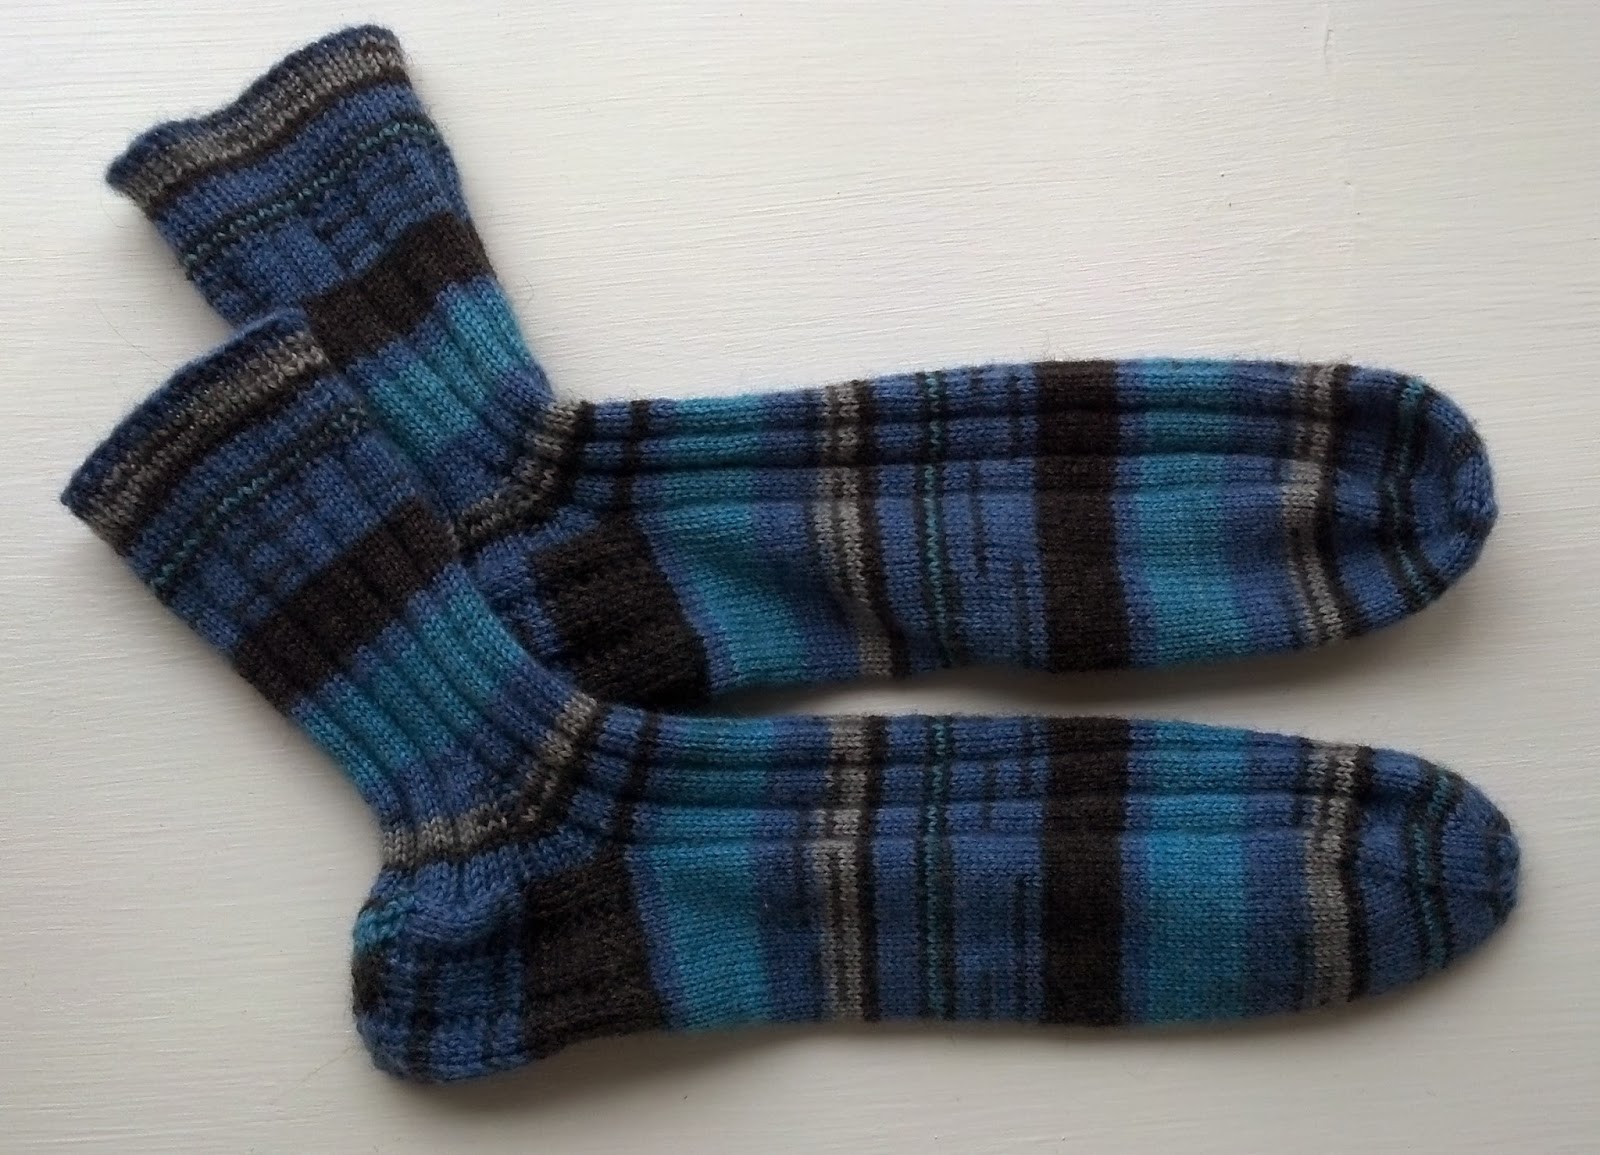
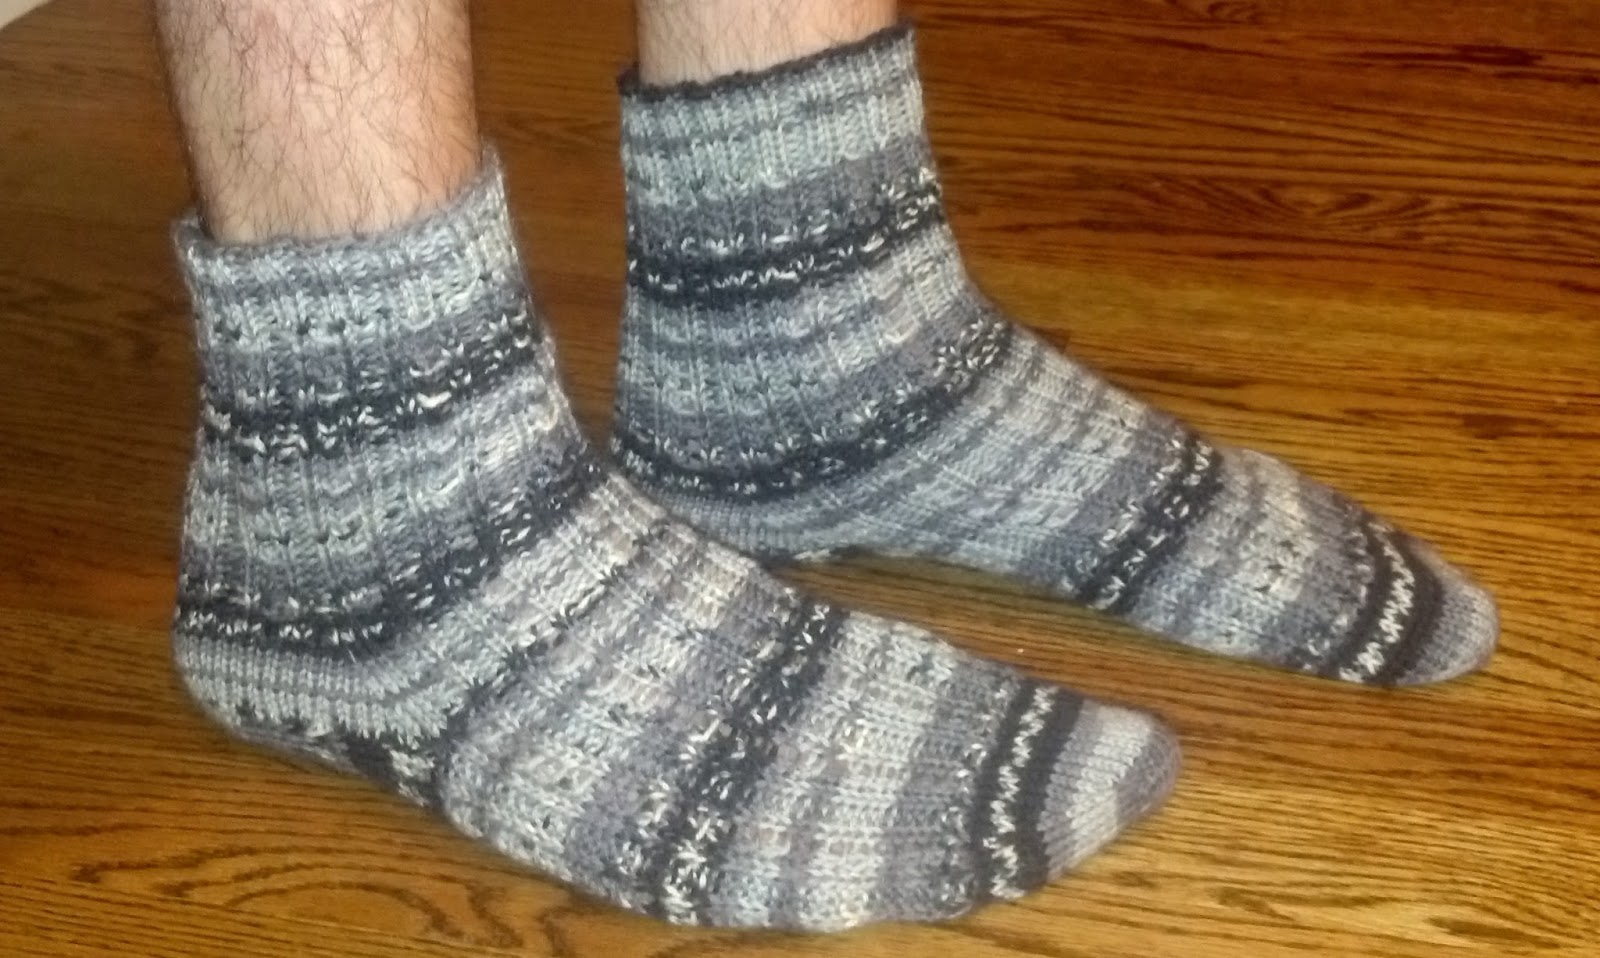
Finished Measurements:
Pattern written for women’s size 8 socks, but it is easily customizable to fit any foot size.
Materials:
Size 1 double pointed needles
(MC) 1 skein Lion Brand Sock-Ease in Toffee – this yarn is great and has aloe infused in it!
(CC) 1 skein Premier yarns, Deborah Norville Collection, Serenity Sock Weight in soft white
Cable hook, or if you’re feeling adventurous, I recommend watching this video to learn how to cable without the hook. It’s really convenient for knitting on the go with limited supplies.
Yarn Substitute: Stroll
This post contains affiliate links. If you do decide to purchase though the links in this post, a small portion of the sale may go to support this site, at no additional cost to you.

Abbreviations:
K – knit
P – purl
Sl – slip unworked stitch from left needle to right needle
SSK – slip unworked stitch from left needle to right needle knitwise. Slip a second unworked stitch from the left needle to the right needle knitwise. Slip those two unworked stitches separately back to the left needle purlwise. Knit those two stitches together in the back of the stitches (decrease).
K2tog – knit two stitches together (decrease).
P2tog – purl two stitches together (decrease).
Inc – knit into the front and back of the same stitch (increase).
Cn – cable needle
MC – main color
CC – contrast color
Braided Cable Knit Pattern:
This pattern repeats throughout the top of the sock, with the bottom of the heel and back of the ankle worked in stockinette stitch. Use the MC unless specifically noted to use the CC.

Row 1: P2, K6, P3, K3, K3 in CC, K3, P3, K6, P2.
Row 2: Repeat Row 1.
Row 3: P2, sl 2 front, K2, K2 from cn, K2, P3, sl 3 front, K3 in CC, K3 from cn, K3, P3, sl 2 front, K2, K2 from cn, K2, P2.
Row 4: P2, K6, P3, K3 in CC, K6, P3, K6, P2.
Rows 5-6: Repeat Row 4.
Row 7: P2, K2, sl 2 back, K2, K2 from cn, P3, K3 in CC, sl 3 back, K3, K3 from cn, P3, K2, sl 2 back, K2, K2 from cn, P2.
Row 8: P2, K6, P3, K3 in CC, K6, P3, K6, P3.
Row 9-10: Repeat Row 8.
Row 11: P2, sl 2 front, K2, K2 from cn, K2, P3, sl 3 front, K3, K3 in CC from cn, K3, P3, sl 2 front, K2, K2 from cn, K2, P2.
Rows 12-14: Repeat Row 1.
Row 15: P2, K2, sl 2 back, K2, K2 from cn, P3, K3, sl 3 back, K3, K3 in CC from cn, P3, K2, sl 2 back, K2, K2 from cn, P2.
Row 16: P2, K6, P3, K6, K3 in CC, P3, K6, P3.
Rows 17-18: Repeat Row 16.
Row 19: P2, sl 2 front, K2, K2 from cn, K2, P3, sl 3 front, K3, K3 from cn, K3 in CC, P3, sl 2 front, K2, K2 from cn, K2, P2.
Rows 20-22: Repeat Row 16.
Row 23: P2, K2, sl 2 back, K2, K2 from cn, P3, K3, sl 3 back, K3 in CC, K3 from cn, P3, K2, sl 2 back, K2, K2 from cn, P2.
Row 24: Repeat Row 1.

Instructions:
Toe Shaping
Using provisional cast on method, cast on 8 stitches
Round 1: P across
Round 2: K across
Round 3: P across
Round 4: K across
Remove live stitches from scrap yarn and place them on a double pointed needle. You should have 16 sts on two needles (8 sts per needle). Begin knitting in the round.
Round 5: *K2, Inc, K1 (add a needle) K1, Inc, K2.* Repeat from * to * (12 sts)
Round 6: Needle 1 – K2, Inc, K across needle
Needle 2 – K across needle to last 3 sts, Inc, K2
Needle 3 – K2, Inc, K across needle
Needle 4 – K across needle to last 3 sts, Inc, K2
Repeat Round 6 until you have 32 sts total (8 sts per needle)
Round 7: K across
Round 8: Needle 1 – K2, Inc, K across needle
Needle 2 – K across needle to last 3 sts, Inc, K2
Needle 3 – K2, Inc, K across needle
Needle 4 – K across needle to last 3 sts, Inc, K2
Repeat Round 7 and Round 8 until you have 60 sts total (15 sts per needle)
Round 9: K across
Round 10: Needle 1 – K2, Inc, K across needle
Needle 2 – K across
Needle 3 – K2, Inc, K across needle
Needle 4 – K across
At this point, you should have 62 sts total, with 16 sts on Needles 1 and 3, and 15 sts on Needles 2 and 4.

Foot:
For all foot rounds, work the Braided Cable Knit Pattern across Needles 1 and 2 and work the stockinette stitch across Needles 3 and 4. In other words, you will work the cable pattern over the top of the foot and stockinette stitch over the bottom of the foot.
Work the Braided Cable Knit Pattern 3 times for a size 8 woman’s foot. For other sizes, work until the sock is the length from the toe to the bend of your ankle at the top of your foot.

Heel Flap:
Turn so WS is facing and Work Needles 3 and 4 ONLY (31 sts)
Leave Needles 1 and 2 unworked
Use CC only
Row 11: Sl1, P across.
Row 12: Sl1, K3, P2, *K4, P2.* Repeat from * to * to end.
Repeat Rows 11 and 12, 11 more times (12 repeats total, 24 rows total).
Heel Shaping:
Row 13: Sl1, P15, P2tog, P1, turn. Leave remaining sts unworked. Continue in this manner.
Row 14: Sl1, K3, K2tog, K1, turn.
Row 15: Sl1, P4, P2tog, P1, turn.
Row 16: Sl1, K5, K2tog, K1, turn.
Row 17: Sl1, P6, P2tog, P1, turn.
Row 18: Sl1, K7, K2tog, K1, turn.
Row 19: Sl1, P8, P2tog, P1, turn.
Row 20: Sl1, K9, K2tog, K1, turn.
Row 21: Sl1, P10, P2tog, P1, turn.
Row 22: Sl1, K11, K2tog, K1, turn.
Row 23: Sl1, P12, P2tog, P1, turn.
Row 24: Sl1, K13, K2tog, K1, turn.
Row 25: Sl1, P14, P2tog, P1, turn.
Row 26: Sl1, K15, K2tog. Do not turn.
Begin working in the round again.
Round 27: Still using CC, pick up and K 12 sts along first side of the heel. Switch to MC and work in pattern across the two needles left unworked during the heel flap. Pick up and K 12 sts along second side of the heel. On the same needle, K 8 sts from the heel flap, splitting the sts from the heel flap between the two needles with the picked up sts. This is now the start of the round.

Repeat Round 28 and Round 29 until there are 62 sts total. Two needles should have 15 sts and two needles should have 16 sts.


