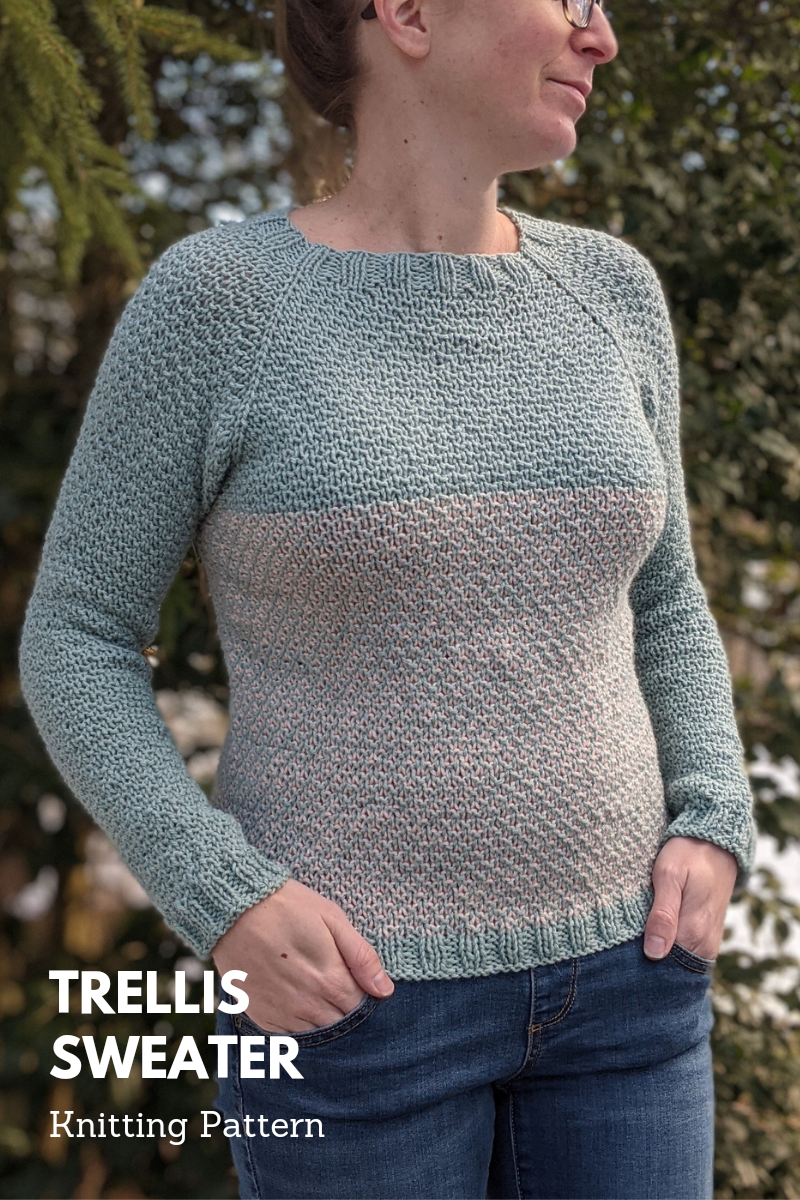
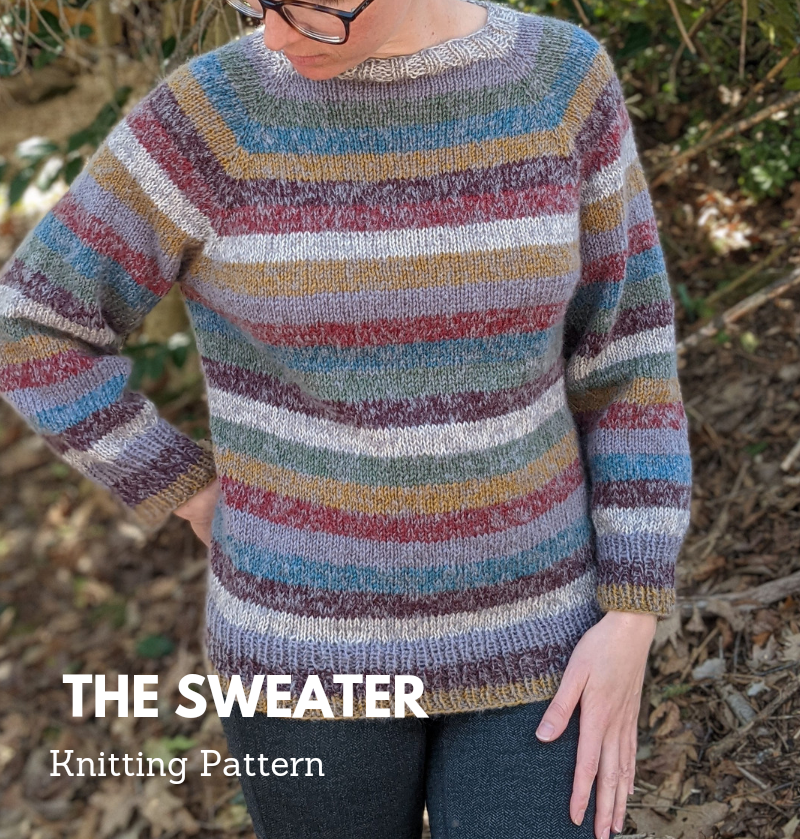
Posted on

Pattern: Beachcomber’s Wrap


Find a printer-friendly, PDF version of the Beachcomber’s Wrap below!

A light, cotton shawl worked in colorful wedges

ABOUT

Skill Level:

Intermediate

Pattern Notes:

When stitches appear between * and *, repeat until the end, unless otherwise indicated

This shawl is worked using short rows to make slightly offset wedges in different colors. The half linens stitch works up like a dream in cotton!

When you work a row over a wrapped stitch, be sure to pick up the wrap and work it with the live stitch

For all odd numbered rows, use the same color worked in the precious row

Materials:

1 skein Loops & Threads Coastal Cotton in Cloud (Color A)

1 skein Loops & Threads Coastal Cotton in Pink (Color B)

1 skein Loops & Threads Coastal Cotton in Aqua (Color C)

1 skein Loops & Threads Coastal Cotton in Purple (Color D)

1 skein Loops & Threads Coastal Cotton in Berry (Color E)

Size 7 (US) circular knitting needle

Finished Measurements:

51″ long, 22″ wide

Gauge:

18 sts x 26 rows = 4 inches (in half linen stitch)

STITCH ABBREVIATIONS

CO – cast on

K – knit

P – purl

Wrp-tp – with the yarn in the front, slip the next stitch purl wise, bring the yarn to the back, slip the stitch from the right needle back to the left needle, turn

Sl – slip the stitch purlwise

WYIF – with the yarn held in the front

RS – right side

WS – wrong side

BO – bind off

INSTRUCTIONS

In Color A, CO 128

Row 1 and all odd-numbered rows (WS): P

Row 2 (RS): In Color B, *K1, sl WYIF* until last 4 sts, wrp-tp

Row 4: In Color A, K2, *sl WYIF, K1* until last 4 sts before last wrapped st, wrp-tp

Row 6: In Color B, *K1, sl WYIF* until last 4 sts before last wrapped st, wrp-tp

Repeat Rows 4-7 until you have worked an odd-numbered row with only 4 sts

Cut yarn

Row 8: In Color C, CO 4 sts, K2, *sl WYIF, K1* until 8 sts remain, wrp-tp

Row 10: In Color B, *K1, sl WYIF* until last 4 sts, wrp-tp

Row 12: In Color C, K2, *sl WYIF, K1* until last 4 sts before last wrapped st, wrp-tp

Repeat Rows 10-13 until you have worked an odd-numbered row with only 4 sts

Cut yarn

Row 14: In Color D, CO 4 sts, *K1, sl WYIF* until 12 sts remain, wrp-tp

Row 16: In Color C, K2, *sl WYIF, K1* until last 4 sts before last wrapped st, wrp-tp

Row 18: In Color D, *K1, sl WYIF* until last 4 sts, wrp-tp

Repeat Rows 16-19 until you have worked an odd-numbered row with only 4 sts

Cut yarn

Row 20: In Color E, CO 4 sts, K2, *sl WYIF, K1* until 16 sts remain, wrp-tp

Row 22: In Color D, *K1, sl WYIF* until last 4 sts, wrp-tp

Row 24: In Color E, K2, *sl WYIF, K1* until last 4 sts before last wrapped st, wrp-tp

Repeat Rows 22-25 until you have worked an odd-numbered row with only 4 sts

Cut yarn

Row 26: In Color A, CO 4 sts, *K1, sl WYIF* until 20 sts remain, wrp-tp

Row 28: In Color E, K2, *sl WYIF, K1* until last 4 sts before last wrapped st, wrp-tp

Row 30: In Color A, *K1, sl WYIF* until last 4 sts, wrp-tp

Repeat Rows 28-31 until you have worked an odd-numbered row with only 4 sts

Cut yarn

Row 32: In Color B, CO 4 sts, K2, *sl WYIF, K1* until 24 sts remain, wrp-tp

Row 34: In Color A, *K1, sl WYIF* until last 4 sts, wrp-tp

Row 36: In Color B, K2, *sl WYIF, K1* until last 4 sts before last wrapped st, wrp-tp

Repeat Rows 34-37 until you have worked an odd-numbered row with only 4 sts

Cut yarn

Row 38: In Color C, CO 4 sts, *K1, sl WYIF* until 28 sts remain, wrp-tp

Row 40: In Color B, K2, *sl WYIF, K1* until last 4 sts before last wrapped st, wrp-tp

Row 42: In Color C, *K1, sl WYIF* until last 4 sts, wrp-tp

Repeat Rows 40-43 until you have worked an odd-numbered row with only 4 sts

Cut yarn

Row 44: In Color D, CO 4 sts, K2, *sl WYIF, K1* until 32 sts remain, wrp-tp

Row 46: In Color C, *K1, sl WYIF* until last 4 sts, wrp-tp

Row 48: In Color D, K2, *sl WYIF, K1* until last 4 sts before last wrapped st, wrp-tp

Repeat Rows 46-49 until you have worked an odd-numbered row with only 4 sts

Cut yarn

Row 50: In Color E, CO 4 sts, *K1, sl WYIF* until  36 sts remain, wrp-tp

Row 52: In Color D, K2, *sl WYIF, K1* until last 4 sts before last wrapped st, wrp-tp

Row 54: In Color E, *K1, sl WYIF* until last 4 sts, wrp-tp

Repeat Rows 52-55 until you have worked an odd-numbered row with only 4 sts

Cut yarn

Row 56: In Color A, CO 4 sts, K2, *sl WYIF, K1* until 40 sts remain, wrp-tp

Row 58: In Color E, *K1, sl WYIF* until last 4 sts, wrp-tp

Row 60: In Color A: K2, *sl WYIF, K1* until last 4 sts before last wrapped st, wrp-tp

Repeat Rows 58-61 until you have worked an odd-numbered row with only 4 sts

Cut yarn

(RS) In Color A, BO across all sts using the Icelandic Bind Off (video tutorial available here).

Cut yarn and weave in ends

THANK YOU!

I hope you enjoyed making the Beachcomber’s Wrap as much as I did! Tag me on Instagram @knitabitcrochetaway and use #knitabitcrochetaway and #BeachcombersWrap – I’d love to see your progress and finished product!

Posted on

Pattern: Spring Fling Tank

ABOUT

Skill Level:

Beginner

Pattern Notes:

When stitches appear between * and *, repeat until the end, unless otherwise indicated

This tank is worked in two rectangular pieces – the front panel and the back panel – that are sewn together in the end. Easy peasy!

This tank has 1-2 inches of positive ease.

Materials:

2 (2, 3, 3, 3, 3, 3, 3, 3) skeins Lily Sugar N Cream in Ecru Doux (MC)

2 (2, 3, 3, 3, 3, 3, 3, 3) skeins Lily Sugar N Cream in Camomile (CC)

Size K/10.5 (US) 6.5 mm crochet hook

Tapestry needle

Sizes:

XS (S, M, L, XL, 2XL, 3XL, 4XL, 5XL)

Finished Measurements:

Bust: 31″ (35, 39, 43, 47, 51, 55, 59, 63″)

Length: 20″ (20.5, 21.5, 22, 22, 23, 23, 24, 24)

Gauge:

8 sts x 9 rows = 4 inches (in Ch 1, HDC, counts as 1 st)

STITCH ABBREVIATIONS

Ch – chain

HDC – half double crochet

MC – main color

CC – contrast color

St(s) – stitch(es)

INSTRUCTIONS

Front Panel:

In CC, Ch 53 (55, 59, 61, 63, 65, 65, 67, 67)

Row 1: HDC in 2nd Ch from hook, HDC in each Ch across

Row 2: Ch 1, HDC in first st, *Ch 1, skip next st, HDC in next st.*

Row 3: *Ch 1, HDC in next Ch space* until you worked the last Ch space, Ch 1, HDC in first st from previous row.

Repeat Row 3 an additional 18 (19, 20, 20, 20, 21, 21, 22, 22) times.

In MC, repeat Row 3 for a total of 26 (27, 28, 29, 29, 30, 30, 31, 31) times.

Cut yarn.

Back Panel:

Repeat Front Panel steps to create a back panel.

Sewing:

Note: when sewing, make sure to use the MC when sewing together MC sts or rows, and use the CC when sewing together CC sts or rows. This means you will need to change colors when sewing up the side seams.

With wrong sides of the panels facing, line up the rows so the MC and CC rows match each other. The bottom of the panel is in the CC and the top of the panel is in the MC. Sew up the sides first, going from the bottom to the top. Leave 12 (13, 14, 14, 15, 16, 17, 17, 18) rows unworked at the top for the armhole.

At the top of the panel, sew 12 (12, 13, 13, 14, 14, 14, 15, 15) sts together on the left side and sew 12 (12, 13, 13, 14, 14, 14, 15, 15) sts together on the right side, leaving 28 (30, 32, 34, 34, 36, 36, 36, 36) sts un-sewn for the neck hole.

Weave in ends and wear with pride!

THANK YOU!

I hope you enjoyed making the Spring Fling Tank as much as I did! Tag me on Instagram @knitabitcrochetaway and use #knitabitcrochetaway and #SpringFlingTank – I’d love to see your progress and finished product!

Posted on

Pattern: Entangled Scarf


Find a printer-friendly, PDF version of Entangled Scarf below!

ABOUT

Skill Level:

Advanced Beginner

Pattern Notes:

When stitches appear between * and *, repeat until the end, unless otherwise indicated

When stitches appear between ( and ), work those stitches in the same stitch indicated

Because you skip the last DC and SC (or SC and DC) at the end of each row, each row gets shorter, leaving a staircase-looking edge

The piece is shaped like a long isosceles trapezoid (math is fun!)

COMPONENTS

Materials:

4 skeins Lion Brand Wool Ease Thick & Quick in Jam Cookie

Size M/13 (US) / 9 mm crochet hook

Tapestry needle

Finished Measurements:

12 inches wide x 84 inches long at the longer edge (excluding tassels)

Gauge:

6.5 sts x 8 rows = 4 inches (in SC)

STITCH ABBREVIATIONS

Ch – chain

SC – single crochet

DC – double crochet

WS – wrong side

INSTRUCTIONS

Scarf:

Ch 152

Row 1: 1 DC in 2ndch from hook, *ch 1, skip next ch, 1 SC in next ch, 1 DC in next ch,* turn.

Row 2: Ch 1, skip 1stDC and SC, (1 DC, 1 SC) in next ch space, *ch 1, (1 DC, 1 SC) in next ch space,* through last ch space, leaving last DC and SC unworked, turn.

Row 3: Ch 1, skip 1stSC and DC, (1 SC, 1 DC) in next ch space, *ch 1, (1 SC, 1 DC) in next ch space,* through last ch space, leaving last SC and DC unworked, turn.

Repeat Rows 2-3 seven more times (eight repeats total).

Tassels:

A video tutorial for attaching the tassels is available here, or written instructions are below.

Cut the remaining yarn you have into 15” pieces until you have 90 pieces to form the tassels. You will need 18 tassels total, with 9 tassels per side, and 5 pieces of string per tassel.

The tassels are attached to the ch space closest to the edge of the row. Tassels are only attached to the odd numbered rows (i.e. the first row, the last row, and alternating rows in between).

To attach a tassel, fold the 5 pieces of string in half, creating a loop in the middle. With the WS of the work facing, put the loop through the ch space, inserting it from the bottom of the work to the top of the work. Pull the tassel ends through the loop and pull tight.

THANK YOU!

I hope you enjoyed making the Entangled Scarf as much as I did! Tag me on Instagram @knitabitcrochetaway and use #knitabitcrochetaway and #EntangledScarf– I’d love to see your progress and finished product!

Posted on

Pattern: Broken Ladder Socks

Toe-up whelk stitch socks


Find a printer-friendly, PDF version of Broken Ladder Socks below!
 

ABOUT

Skill Level:

Intermediate

Pattern Notes:

Stitches that appear between * and * should be worked until the end, unless otherwise indicated.

These socks are worked from the toe-up and the length can be easily adjusted to fit the average woman’s foot.

COMPONENTS

Materials:

1 skein Loops & Threads Perfect Pair in Born to Run
Size 1 double pointed needles
Scrap yarn

Yarn Substitute: Stroll

This post contains affiliate links. If you do decide to purchase though the links in this post, a small portion of the sale may go to support this site, at no additional cost to you.

Size:

Adult

Gauge:

28 sts x 36 rows = 4 inches

STITCH ABBREVIATIONS

K – knit

P – purl

Sl – slip unworked stitch from left needle to right needle

SSK – slip unworked stitch from left needle to right needle knitwise. Slip a second unworked stitch from the left needle to the right needle knitwise. Slip those two unworked stitches separately back to the left needle purlwise. Knit those two stitches together in the back of the stitches (decrease).

K2tog – knit two stitches together (decrease).

P2tog – purl two stitches together (decrease).

Inc – knit into the front and back of the same stitch (increase).

Welk Stitch Pattern:

Row 1: *K1, sl1, K2*

Row 2: *P1, sl1, P2*

Rows 3-4: *K3, sl1* 

INSTRUCTIONS

Toe Shaping:
Using provisional cast on method and the scrap yarn, cast on 12 stitches
Row 2: Purl across
Row 3: Knit across
Row 4: Purl across

Remove live stitches from scrap yarn and place them on a double pointed needle. You should have 24 sts on two needles. Begin knitting in the round.

Round 5: *K2, Inc, K4 (add a needle) K4, Inc, K2.* Repeat from * to *
Round 6: Needle 1 – K2, Inc, K across needle
     Needle 2 – K across needle to last 3 sts, Inc, K2
     Needle 3 – K2, Inc, K across needle
     Needle 4 – K across needle to last 3 sts, Inc, K2

Repeat Round 6 until you have 40 sts total, or 10 sts per needle

Round 7: K across
Round 8: Needle 1 – K2, Inc, K across needle
     Needle 2 – K across needle to last 3 sts, Inc, K2
     Needle 3 – K2, Inc, K across needle
     Needle 4 – K across needle to last 3 sts, Inc, K2

Repeat Rounds 7-8 until you have 52 sts total, 13 sts per needle

Rounds 9-10: K across
Round 11: Needle 1 – K2, Inc, K across needle

     Needle 2 – K across needle to last 3 sts, Inc, K2
     Needle 3 – K2, Inc, K across needle
     Needle 4 – K across needle to last 3 sts, Inc, K2

Repeat Rounds 9-11 until you have 60 sts total, 15 sts per needle

Rounds 12-14: K across
Round 15: Needle 1 – K2, Inc, K across needle

     Needle 2 – K across needle to last 3 sts, Inc, K2
     Needle 3 – K2, Inc, K across needle
     Needle 4 – K across needle to last 3 sts, Inc, K2

You should now have 64 sts total, 16 sts per needle

Foot:
Round 16: Needle 1 – work Whelk Stitch pattern
    Needle 2 – work Whelk Stitch pattern
    Needle 3 – K across needle
    Needle 4 – K across needle

Repeat Round 16 until the sock fits from your toes to the bend in the top of your foot where your ankle starts. 

Heel Flap:
Turn and work across Needles 3 and 4 only (worked flat), leaving Needles 1 and 2 unworked. 

Row 17: Sl1, P across, turn
Row 18: Sl 1, K across, turn

Repeat Rows 17 and 18 for a total of 22 rows total.

Heel Shaping:
Row 19: Sl1, P17, P2tog, P1, turn (leave remaining sts unworked) 
Row 20: Sl1, K5, SSK, K1, turn (leave remaining sts unworked) 
Row 21: Sl1, P6, P2tog, P1, turn (leave remaining sts unworked)  
Row 22: Sl1, K7, SSK, K1, turn (leave remaining sts unworked) 
Row 23: Sl1, P8, P2tog, P1, turn (leave remaining sts unworked) 
Row 24: Sl1, K9, SSK, K1, turn (leave remaining sts unworked) 
Row 25: Sl1, P10, P2tog, P1, turn (leave remaining sts unworked) 
Row 26: Sl1, K11, SSK, K1, turn (leave remaining sts unworked) 
Row 27: Sl1, P12, P2tog, P1, turn (leave remaining sts unworked) 
Row 28: Sl1, K13, SSK, K1, turn (leave remaining sts unworked) 
Row 29: Sl1, P14, P2tog, P1, turn (leave remaining sts unworked) 
Row 30: Sl1, K15, SSK, K1, turn (leave remaining sts unworked) 
Row 31: Sl1, P16, P2tog, turn

Row 32: Sl1, K across until last 2 sts, SSK. Split the 18 heel flap sts evenly across 2 needles (9 sts per needle). The first needle now becomes Needle 4 and the second needle now becomes Needle 1. Begin working in the round again.

Round 33: On Needle 1, pick up and K 11 sts along heel flap edge, work across Needles 2 and 3 in Whelk Stitch pattern, on Needle 4, pick up and K 11 sts along heel flap edge, K across last 9 sts on the same needle.

Gusset Shaping: (decrease)
Round 34: Needle 1 – K to last 3 sts, K2tog, K1
    Needles 2-3 – Work Whelk Stitch pattern
    Needle 4 – K1, SSK, K to end

Round 35: K across Needles 1 and 4, Whelk Stitch pattern across Needles 2 and 3.

Repeat Rounds 34-35 until there are 16 sts per needle

Ankle:
Round 36: Work Whelk Stitch pattern across all needles until you reach 1 inch below desired length

Round 37: *K1, P1* 

Repeat Round 37 for 1 inch. 

Bind off using Icelandic Bind Off (video tutorial available here).

Repeat pattern for second sock.

Posted on

Pattern: Show Me Your Spots Cowl

A bright and colorful spotty cowl


Find a printer-friendly, PDF version of Show Me Your Spots Cowl below!

ABOUT

Skill Level:

Advanced Beginner

Pattern Notes:

This cowl is knit in one piece in the round and top down. It is meant to use nearly all yarn in the skein listed below.

This pattern uses a color work chart for the Spots Pattern.

When stitches appear between * and *, repeat until the end, unless otherwise indicated.

COMPONENTS

Materials:

1 skein Yarn Bee Pigment & Fiber in Friday’s in Florence

Size 2 (US) circular knitting needles

Stitch marker

Tapestry needle

Finished Measurements:

17 inches tall x 32 inches around

Gauge:

28 sts x 28 rows = 4 inches

STITCH ABBREVIATIONS

K – knit

CO – cast on

St(s) – stitch(es)

MC – main color

CC – contrast color

INSTRUCTIONS

Color ID:

Color A: Silver

Color B: Green

Color C: Yellow

Color D: Maroon

Color E: Blue

Color F: Black

Spots Pattern:

CO 216 sts. Place marker at beginning of round. Begin working in the round.

Rounds 1-3: With Color A, *K1, P1*

Rounds 4-13: With Color A as MC and Color B as CC, K across, following the Spots Pattern chart for each Round.

Rounds 14-23: With Color C as MC and Color D as CC, K across, following the Spots Pattern chart for each Round.

Rounds 24-33: With Color E as MC and Color F as CC, K across, following the Spots Pattern chart for each Round.

Rounds 34-43: With Color B as MC and Color C as CC, K across, following the Spots Pattern chart for each Round.

Rounds 44-53: With Color D as MC and Color E as CC, K across, following the Spots Pattern chart for each Round.

Rounds 54-63: With Color F as MC and Color A as CC, K across, following the Spots Pattern chart for each Round.

Rounds 64-66: With Color F, *K1, P1*

Bind off. Use a tapestry needle to weave in ends. 

THANK YOU!

I hope you enjoyed making the Show Me Your Spots Cowl as much as I did! Tag me on Instagram @knitabitcrochetaway and use #knitabitcrochetaway and #ShowMeYourSpotsCowl – I’d love to see your progress and finished product!

Posted on

Pattern: Sadie Bonnet

A simple crochet bonnet with easy drawstring


Find a printer-friendly, PDF version of Sadie Bonnet below!
 

ABOUT

Skill Level:

Beginner

Pattern Notes:

This bonnet is made in one piece with the back edge sewn together at the end.

A drawstring pulls the base of the bonnet to frame the face

COMPONENTS

Materials:

Size I crochet hook

1 skein I Love This Yarn! or 125 (150, 175) yards of worsted weight yarn

Tapestry needle

Pompom (optional)

Size:

Small (Medium, Large)

3-6 months (6-12 months, 12-24 months)

Finished Measurements:

6.5 inches tall, 5.25 inches deep (7.5 inches tall, 6 inches deep; 8.5 inches tall, 7 inches deep)

Gauge:

14 sts x 7.5 rows = 4 inches

STITCH ABBREVIATIONS

Ch – chain

DC – double crochet

INSTRUCTIONS

Bonnet:

Ch 49 (57, 65)

Row 1: 1 DC in 4thch from hook and each ch across, turn.

Row 2: Ch 3, 1 DC in front loops only in each DC across, turn.

Row 3: Ch 3, 1 DC in back loops only in each DC across, turn.

Repeat Rows 2-3 three (four, five) more times.

For Size Large ONLY, Repeat Row 2.

Cut yarn.

With the wrong sides facing, fold in half and sew the ch row together using the tapestry needle.

Drawstring:

Crochet an I-cord until your string measures 25 (30, 35) inches. Here is a linkto great instructions on how to crochet an I-cord.

Weave your drawstring in an out of each space between the first and second DC of each row along the bottom edge of the bonnet.

Pompom: (Optional)

With your favorite faux fur or yarn pompom, attach it to the top corner of the bonnet, with the majority of the pompom resting on top of the corner, rather than the bottom of the corner where you sewed the ch row together up the back of the bonnet. This ensures it won’t flop around too much when worn.

THANK YOU!

I hope you enjoyed making the Sadie Bonnet as much as I did! Tag me on Instagram @knitabitcrochetaway and use #knitabitcrochetaway and #SadieBonnet – I’d love to see your progress and finished product!

Posted on

Pattern: Adelaide Bonnet

A vintage-inspired baby bonnet


Find a printer-friendly, PDF version of Adelaide Bonnet below!
 

ABOUT

Skill Level:

Intermediate

Pattern Notes:

This bonnet is made in one piece with the back edge sewn together at the end.

An I-cord drawstring is attached at the end to help the bonnet frame the face.

Stitches that appear between * and * should be worked until the end, unless otherwise indicated.

COMPONENTS

Materials:

60-65 yards of Yarn Bee Rustic Romantic in Blueberry Bushel

Size 8 double pointed needles

Tapestry needle

Your favorite faux fur pompom

Size:

0-3 months

Finished Measurements:

7 inches tall x 10 inches around (measuring from left cheek to right cheek)

 Gauge:

16 sts x 26 rows = 4 inches

STITCH ABBREVIATIONS

CO – cast on

K – knit

P – purl

Sl – slip

St(s) – stitch(es)

BO – bind off

Ssk – slip stitch from left needle to right needle knitwise. Slip a second stitch from the left needle to the right needle knitwise. Slip those two unworked stitches separately back to the left needle purlwise. Knit those two stitches together in the back of the stitches

INSTRUCTIONS

Bonnet:

Loosely CO 51 sts

Rows 1-30: Sl 1 purlwise, *P1, K1*

Using the Icelandic Bind Offmethod, BO using K across. This forms the bonnet edge that frames the face.

Fold the piece in half and sew the CO edge to the other CO edge together using a tapestry needle.

I-Cord:

CO 3

Work the I-cord for approximately 30 rows, or until it measures 7 inches.

Here is a link to a helpful video that demonstrates how to attach the I-cord edging. Work 2 sts of I-cord until only one stitch remains. Slip the last stitch knitwise. With your right needle and the right side of the bonnet facing you, pick up the right side edge of the first slipped stitch of the bonnet. Pick up the stitch by inserting your needle from top to bottom. Knit the last two sts together as if working a ssk.

Continue attaching the I-cord in this manner along the entire bottom edge of the bonnet. When you have finished attaching the I-cord along the entire bottom edge, work the I-cord for approximately 30 rows, or until it measures 7 inches.

Pompom:

Find the point of the bonnet at the back of the head and attach your favorite faux fur pompom.

THANK YOU!

I hope you enjoyed making the Adelaide Bonnet as much as I did! Tag me on Instagram @knitabitcrochetaway and use #knitabitcrochetaway and #AdelaideBonnet– I’d love to see your progress and finished product!

Posted on

Pattern: Sunset on the Water

A color gradient shawl reminiscent of a sunset


Find a printer-friendly, PDF version of Sunset on the Water below!
 

ABOUT

Skill Level:

Beginner

Pattern Notes:

This pattern uses all of the Stone Washed 10g balls in the Scheepjes Colour Pack Stone Washed – River Washed

Repeat stitches that appear between * and * until the end of the row

COMPONENTS

Materials:

1 Scheepjes Colour Pack Stone Washed – River Washed, or 36 10g skeins of Scheepjes Stone Washed in each of the colors listed in the Color Layout section below

Size 4 (US) needles

Tapestry needle

Finished Measurements:

65” x 16”

Gauge:

25 sts x 20 rows = 4 inches in Linen Stitch

STITCH ABBREVIATIONS

K – knit

P – purl

Sl – slip

CO – cast on

St(s) – stitch(es)

BO – bind off

INSTRUCTIONS

Color Layout

Before you cast on, organize the Stone Washed mini skeins in the following order:

A

Pink Quartzite

Moon Stone

Axinite

Brown Agate

Morganite

Coral

Carnelian

Red Jasper

Rhodochrosite

Tourmaline

Rose Quartz

Lilac Quartz

Garnet

Corundum Ruby

Deep Amethyst

Lepidolite

Obsidian

Black

B

Crystal Quartz

Larimar

Amazonite

Green Agate

Turquoise

Blue Apatite

Malachite

Fosterite

Lanada Jade

Pedirot

New Jade

Lemon Quartz

Enstatite

Citrine

Beryl

Yellow Jasper

Boulder Opal

Smokey Quartz

Linen Stitch

With Color A, CO 104 sts

Row 1: With Color A, *P1, sl1 with yarn held in the back*

Row 2: With Color B, *K1, sl1 with yarn held in the front*

Row 3: With Color B, *P1, sl1 with yarn held in the back*

Row 4: With Color A, *K1, sl1 with yarn held in the front*

Row 5: Repeat Row 1 

Repeat Rows 2-5 until you run through all of the colors. When you finish one color, move to the next color listed in the same column. Be sure to work both Rows 2 and 3, or Rows 4 and 5, in the same color before moving onto the next color in the column. It’s ok if the Color A yarn doesn’t end at the same time as the paired Color B yarn – that adds to the uniqueness of your garment!

When you have used all 10g skeins, BO after working an even row.

Cut yarn. Weave in ends using tapestry needle.

THANK YOU!

I hope you enjoyed making Sunset on the Water as much as I did! Tag me on Instagram @knitabitcrochetaway and use #knitabitcrochetaway and #SunsetOnTheWater– I’d love to see your progress and finished product!

Posted on

Pattern: Staggered Pinwheel Shawl


Find a printer-friendly, PDF version of Staggered Pinwheel Shawl below!

ABOUT

Skill Level:
Intermediate
Pattern Notes:
This shawl is worked in wedges using offsetting short rows to make the staggered wedge edges. This pattern is designed to use the entire skein for each of the skeins in the materials list. If you lose out on yarn chicken in the last wedges, work the last RS row of the wedge until you run out of yarn and continue with the next wedge.
When the symbol * appears in the pattern, repeat the stitches that appear between the two *s until the end of the round, unless indicated otherwise.
COMPONENTS
Materials:
1 skein Loops & Threads Joy DK in Leaf (Color A)
1 skein Loops & Threads Joy DK in Cloud (Color B)
1 skein Loops & Threads Joy DK in Mint (Color C)
Size 6 circular needle
Tapestry needle
Size:
Adult
Finished Measurements:
55 inches long from end to end, 24 inches deep 
Gauge:
16 sts x 17 rows = 4 inches in garter st
STITCH ABBREVIATIONS
CO – cast on
St(s) – stitch(es)
WS – wrong side
RS – right side
K – knit
P – purl 
Wrp-tk – with the yarn in the back, slip the next stitch purlwise, bring the yarn to the front, slip the stitch from the right needle back to the left needle, turn
Wrp-tp – with the yarn in the front, slip the next stitch purlwise, bring the yarn to the back, slip the stitch from the right needle back to the left needle, turn
Yo – yarn over
SK2P – slip the next stitch knitwise, knit the next two stitches together, pass the slipped stitch over the two stitches that were knit together
K3tog – knit three stitches together
 
INSTRUCTIONS 
Note: in working Rows 6, 13, 18, and 23 below, be sure to pick up the wrapped stitch and work it together with the stitch that it’s wrapped around.
In Color A, CO 101 sts.
Row 1: (RS) *K,* turn.
Row 2: (WS) *K* until last 4 sts in current wedge color, wrp-tk.
Row 3: (RS) *K,* turn.
Row 4: (WS) *K* until 4 sts before wrapped stitch, wrp-tk.
Row 5: (RS) *K,* turn.
Repeat Rows 4-5 until you work Row 5 across 5 sts. Cut yarn and turn.
Row 6: (WS) In Color B, CO 8 sts, *P* until last 8 sts in previous wedge color, wrp-tp.
Row 7: (RS) *K1, yo, SK2P, yo* until last st, K1, turn.
Row 8: (WS) *P* until last 4 sts in current wedge color, wrp-tp.
Row 9: (RS) K2, yo, K3tog, yo, *K1, yo, K3tog, yo* until last 4 sts, K4, turn.
Row 10: (WS) *P* until 4 sts before wrapped stitch, wrp-tp.
Row 11: (RS) *K1, yo, SK2P, yo* until last st, K1, turn.
Row 12: (WS) *P* until 4 sts before wrapped stitch, wrp-tp.
Repeat Rows 9-12 until you have 5 sts remaining on a RS row, K5. Cut yarn and turn.
Row 13: (RS) In Color C and starting from the thin end of the wedges (the opposite side of the piece that you just finished working), skip first 8 sts in Color A, skip next 8 sts in Color B, *K* until end, CO 8 sts at the end, turn.
Row 14: (WS) *K* until last 4 sts in the current wedge color, wrp-tk.
Row 15: (RS) *K,* turn.
Row 16: (WS) *K* until 4 sts before wrapped stitch, wrp-tk.
Row 17: (RS) *K,* turn.
Repeat Rows 16-17 until you work Row 17 across 5 sts. Cut yarn and turn.
Row 18: (RS) In Color A and starting from the thin end of the wedges (the opposite side of the piece that you just finished working), skip the 8 sts of all other wedges, including the first 8 sts of the previous wedge color, *K* until end, CO 8 sts at the end, turn.
Row 19: (WS) *K* until last 4 sts in current wedge color, wrp-tk.
Row 20: (RS) *K,* turn.
Row 21: (WS) *K* until 4 sts before wrapped stitch, wrp-tk.
Row 22: (RS) *K,* turn.
Repeat Rows 21-22 until you work Row 22 across 5 sts. Cut yarn and turn.
Repeat Rows 6-22 two more times, then repeat Rows 6-17 one more time. For each Row 13 and Row 18 worked, be sure to skip the 8 sts of all other wedges, including the first 8 sts of the previous wedge color, at the beginning of the row.
Note: For Row 23, you’ll be working across all remaining stitches on all wedges.
Row 23: (RS) In Color C, and starting from the thin end of the wedges (the opposite side of the piece that you just finished working) *K,* turn.
Row 24: (WS) Bind off. Weave in ends using tapestry needle.
THANK YOU!
I hope you enjoyed making the Staggered Pinwheel Shawl as much as I did! Tag me on Instagram @knitabitcrochetaway and use #knitabitcrochetaway and #staggeredpinwheelshawl – I’d love to see your progress and finished product!
Posted on

Pattern: Broken Seed Stitch x Slouch

A slouchy beanie using the full skein of Caron x Pantone

Find a printer-friendly, PDF version of Broken Seed Stitch x Slouch below!


Pattern Notes:
This hat is knit in the round from the bottom up. The pattern is designed to use the entire skein of Caron X Pantone with minimal yarn waste.
When the symbol * appears in the pattern, repeat the stitches that appear between the two *s until the end of the round, unless indicated otherwise.
Each Color (A, B, C, D, E) is labeled based on the number given to the color by the Caron X Pantone tag. See the end of the pattern for other skein color combinations.
COMPONENTS
Materials:
Size 8 circular needles
Size 8 double pointed needles
Stitch marker
Tapestry needle
1 skein Caron x Pantone in Frozen Berry
            Color A – 19-4044
            Color B – 18-2929
            Color C – 17-4540
            Color D – 17-5034
            Color E – 13-4103
Size:
Adult
Finished Measurements:
22 inches (circumference) x 10 inches (height)
Gauge:
16 sts x 18 rows = 4 inches in K1, P1
STITCH ABBREVIATIONS
K– knit
P– purl
K2tog– knit two stitches together
Ssk– slip stitch from left needle to right needle knitwise. Slip a second stitch from the left needle to the right needle knitwise. Slip those two unworked stitches separately back to the left needle purlwise. Knit those two stitches together in the back of the stitches 
CO– cast on
St(s)– stitch(es)
 
INSTRUCTIONS
With size 8 circular needles and Color A, CO 78. Place marker at beginning of round.
Round 1-6: (Color A) *K1, P1*
Round 7: (Color A) *K*
Round 8: (Color B) *K1, P1*
Round 9: (Color A) *K*
Round 10: (Color B) *P1, K1*
Repeat Rounds 7-10 one more time (two repeats total)
Round 11: (Color C) *K*
Round 12: (Color B) *K1, P1*
Round 13: (Color C) *K*
Round 14: (Color B) *P1, K1*
Repeat Rounds 11-14 two more times (three repeats total), then repeat Rounds 11-12
Round 15: (Color C) *K*
Round 16: (Color D) *P1, K1*
Round 17: (Color C) *K*
Round 18: (Color D) *K1, P1*
Repeat Rounds 15-18 one more time (two repeats total)
Round 19: (Color E) *K*
Round 20: (Color D) *P1, K1*
Round 21: (Color E) *K*
Round 22: (Color D) *K1, P1*
Repeat Rounds 19-22 one more time (two repeats total)
Crown Shaping
Round 23: (Color E) *K11, K2tog, ssk, K11*
Round 24: (Color D) *P1, K1*
Round 25: (Color E) *ssk, K20, K2tog*
Round 26: (Color D) *P1, K1*
Round 27: (Color E) *K9, K2tog, ssk, K9*
Round 28: (Color D) *K1, P1*
Round 29: (Color E) *ssk, K16, K2tog*
Round 30: (Color D) *K1, P1*
Round 31: (Color E) *K7, K2tog, ssk, K7*
Round 32: (Color E) *P1, K1*
Round 33: (Color E) *ssk, K12, K2tog*
Round 34: (Color E) *P1, K1*
Round 35: (Color E) *K5, K2tog, ssk, K5*
Round 36: (Color E) *K1, P1*
Round 37: (Color E) *ssk, K8, K2tog*
Round 38: (Color E) *K1, P1*
Round 39: (Color E) *K3, K2tog, ssk, K2*
Round 40: (Color E) *K2tog*
 
 
Color Variations:
Caron x Pantone in Frozen Berry
            Color A – 19-4044
            Color B – 18-2929
            Color C – 17-4540
            Color D – 17-5034
            Color E – 13-4103
Caron x Pantone in Olive Oil
            Color A – 19-0516
            Color B – 16-0906
            Color C – 16-0737
            Color D – 13-0000
            Color E – 14-1210
 
Caron x Pantone in Provincial Lilac
            Color A – 18-1404
            Color B – 15-3912
            Color C – 16-1412
            Color D – 14-4203
            Color E – 11-4302
 
Caron x Pantone in Peach Blush Parfait
            Color A – 18-1633
            Color B – 14-1219
            Color C – 14-4809
            Color D – 12-2902
            Color E – 14-1210